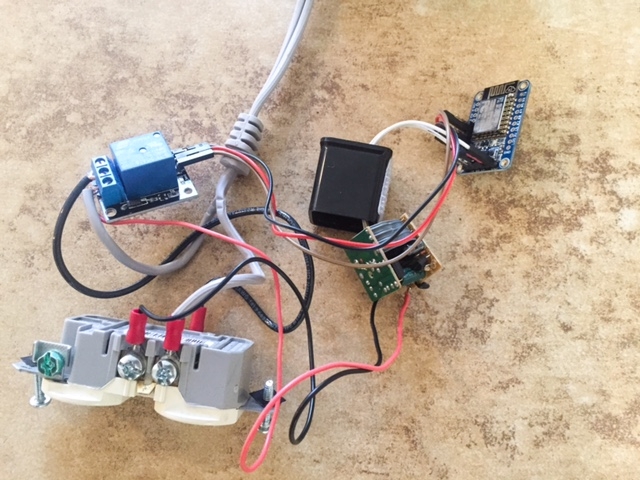
I created this project to learn more about IoT. For the hardware, I used the ESP8266. For the software, I created a mobile app using Meteor JS to interface with it. MQTT was used for communication between the app and the ESP8266 (device).
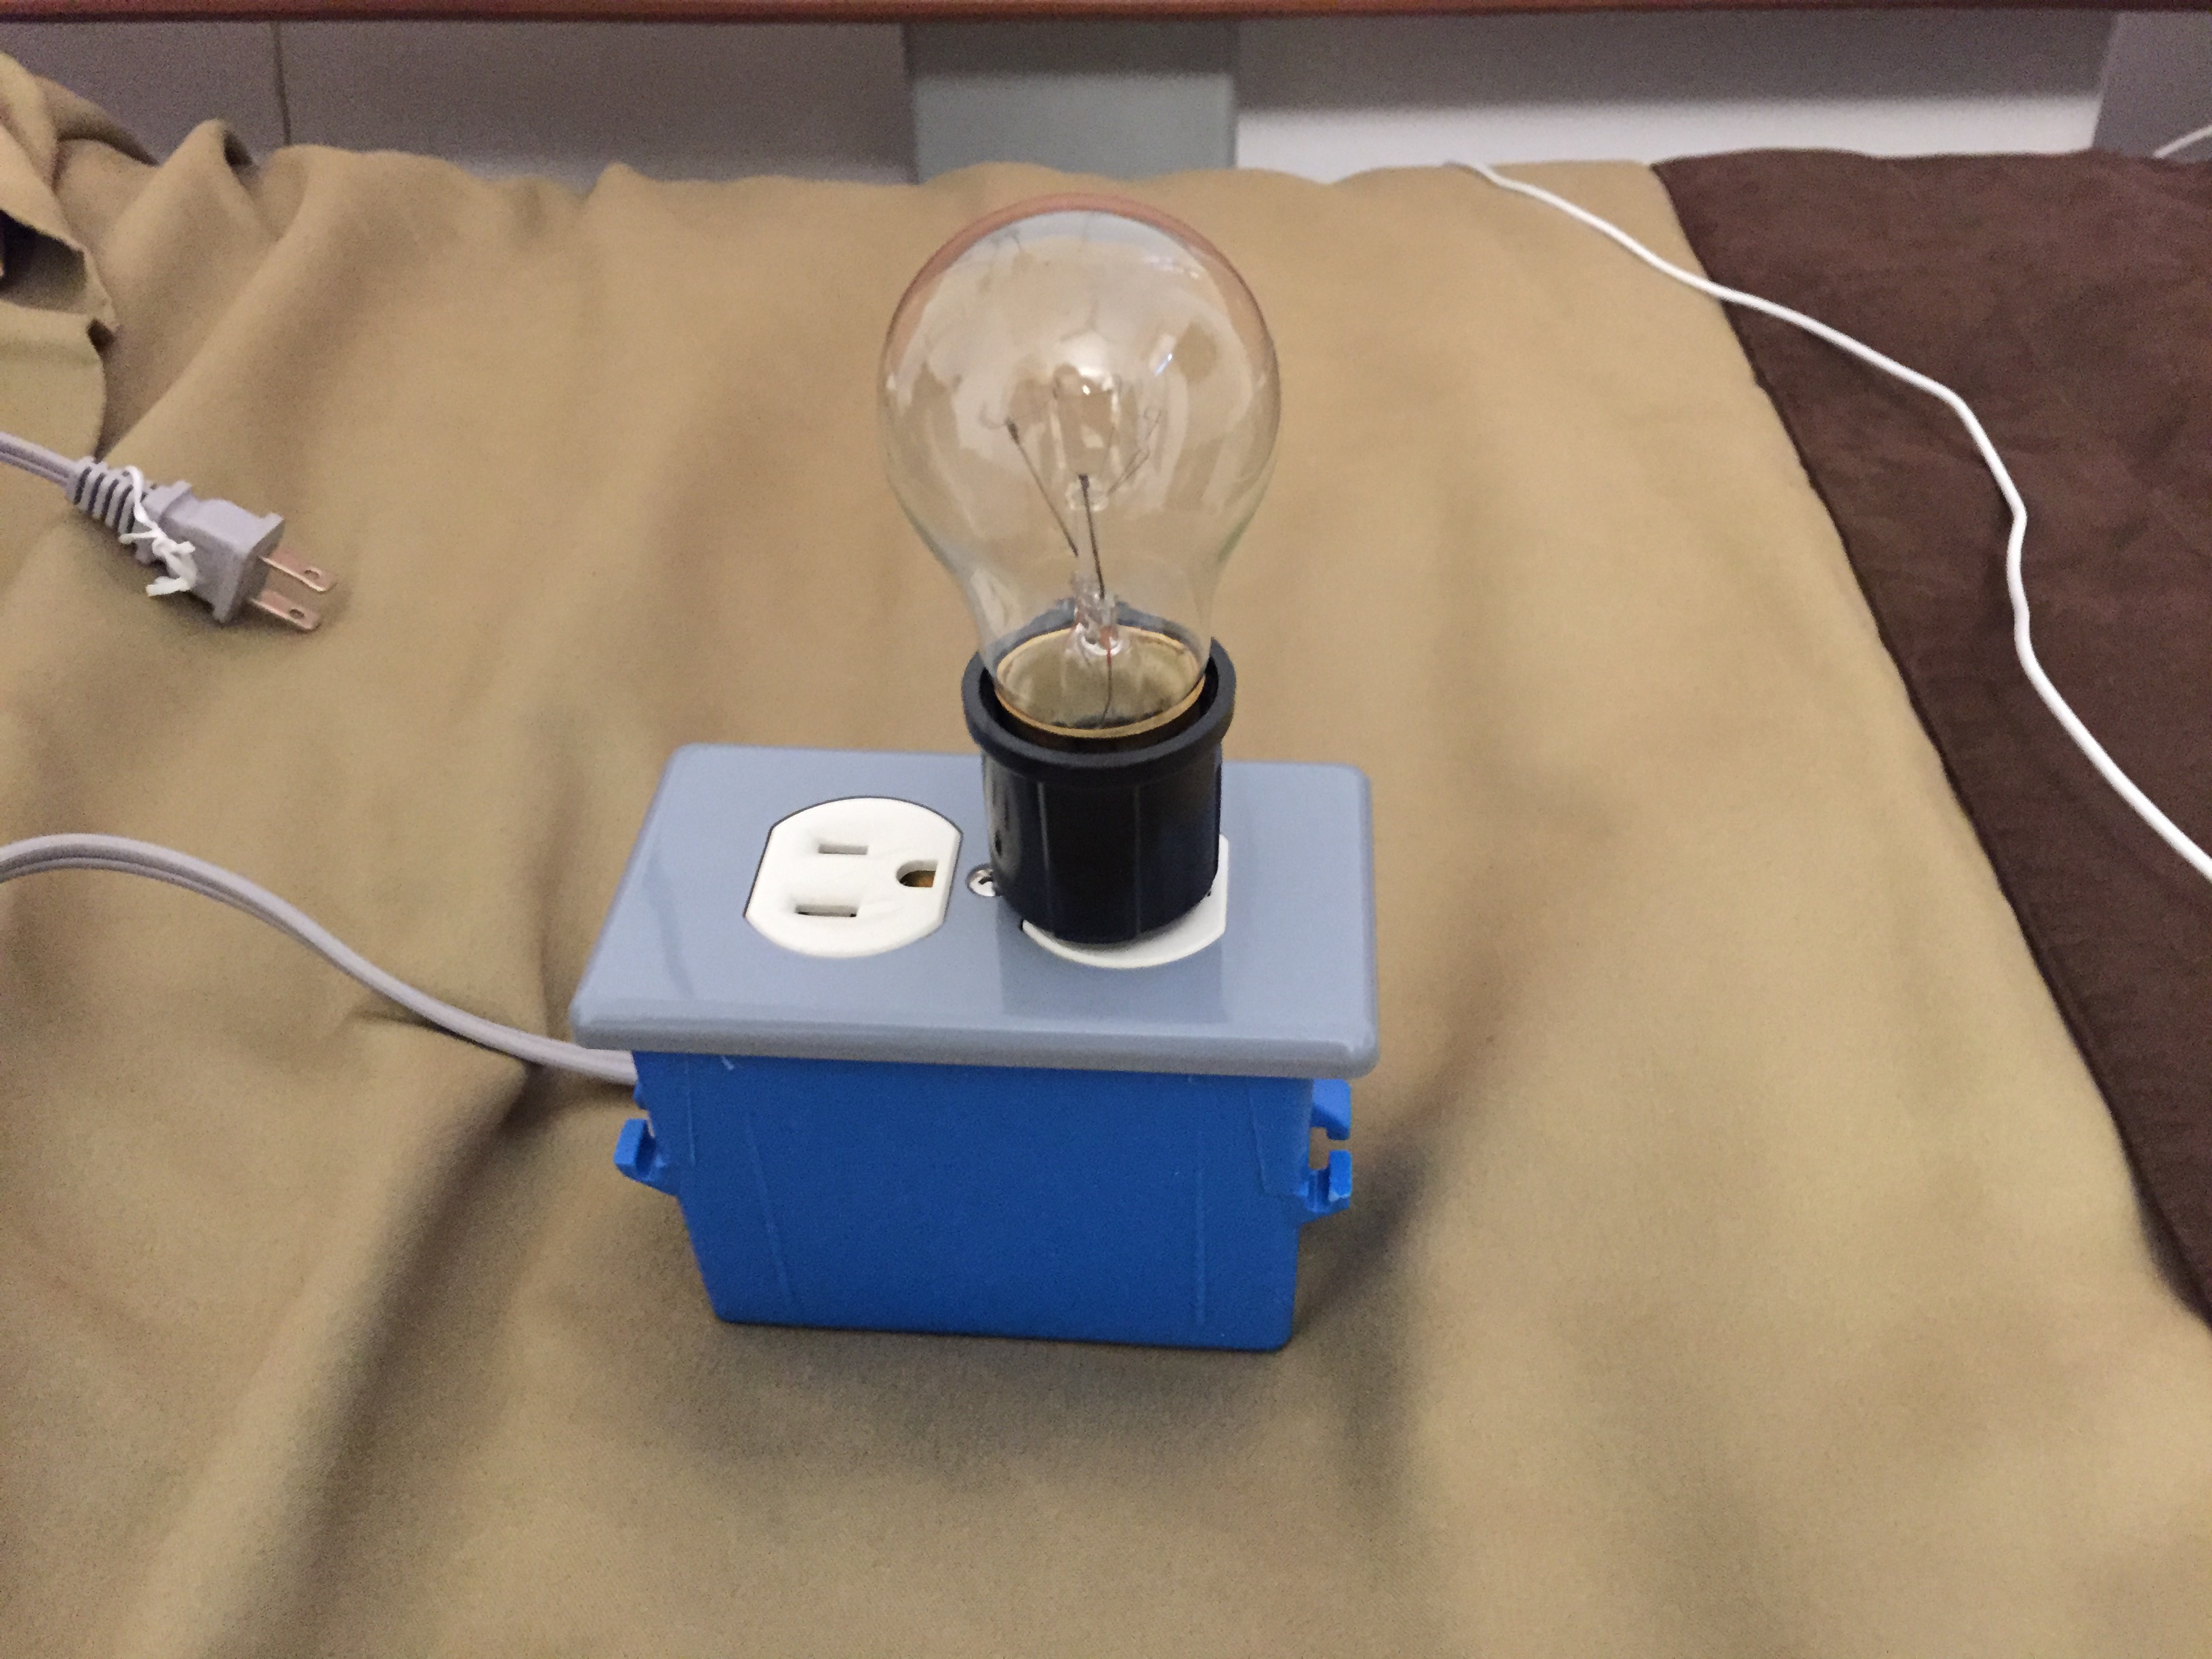
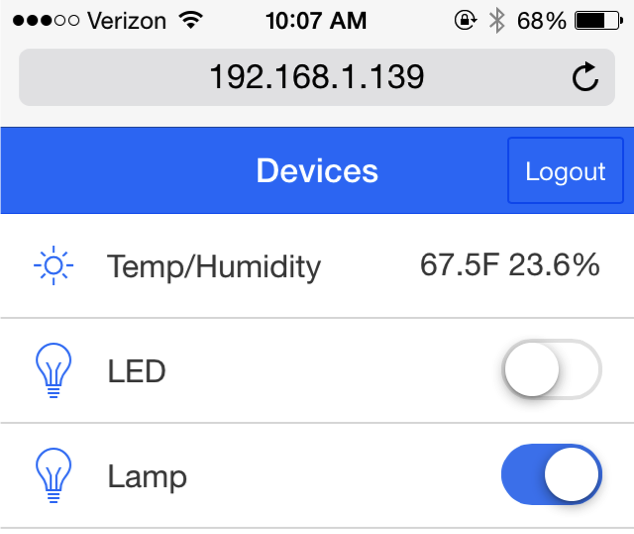
The app can connect to multiple devices to control relays (turn on and off lights and LEDs) and read sensors (temperature and humidity).
To learn more about the ESP8266 and MQTT check out my prior blog posts here and here.
IoT App
I gave a lightning talk at the Meteor Meetup in San Francisco. The rules are 2 minutes or less. Take a look at the YouTube video below for more details on this project.
I plan on publishing more posts on the ESP8266. Please, join my mailing list, so I can notify you when new posts are available.
If you are considering I0T, then you need to learn about MQTT.
MQ Telemetry Transport Protocol (MQTT) is a lightweight publish/subscribe messaging protocol that offers a number of advantages over HTTP. It is binary and has a much smaller payload, which reduces power usage and transmit times with devices.
I thought about writing an article about this, but to be honest, HiveMQ has a great write up here that I recommend checking out.
Mosquito is an open source MQTT broker. I also recommend this if you want to run your own server. I have this running on a Raspberry Pi to support one of my projects.
I plan on publishing more posts on this topic. Please, join my mailing list, so I can notify you when new posts are available.
I have used the Arduino for a few projects, but I recently learned about these new (and very tiny) all-in-one programmable WiFi enabled micro-controllers called ESP8266. While the ESP8266 are extremely small and cheap ($2-4), they are challenging to use for learning and development.
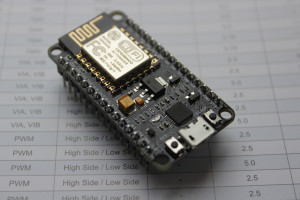
NodeMCU
During my investigation into the ESP8266, I came across the NodeMCU, which is an ESP8266 breakout board that handles 5v->3.3V leveling, USB to Serial (UART), and exposes all the GPIO pins. Due to the size, cost ($8-15 shipped from the US and $4-7 from China) and built in WiFi, I cannot really recommend using an Arduino to start learning with anymore. The NodeMCU is a really great option for starting to play with programmable micro-controllers.
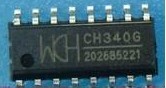
I have a Mac, so I wanted to make sure that I could connect to and program the NodeMCU. I noticed a few differences with these boards. All of these boards come from China and to make them slightly cheaper, they tend to use two different types of USB to Serial chips.
CH340G
One of them is the CH340G and it does not use a signed Mac driver. I was not excited about disabling (or lowering) the security level in the Mac OS to make this work. It does work with Linux and they have Windows drivers, but the badly translated Chinese website kinda turned me off a bit.
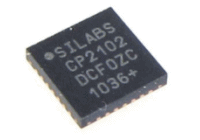
The chip I ended up going with is the CP2102 from SiLabs. I tend to trust the driver for this chip a bit more. The boards are slightly more expensive ($1-3), but I can verify from personal experience that they work with Macs.